センサーで取得したデータをWiFiでスプレッドシートに送信するIoTセンサーを自作
センサーの値をESP WROOM02(ESP8266)で取得し、GASを使ってGoogle Spreadsheetに記録したいと思います。
- 電池の電圧を監視
- 気温の変化を記録
- CO2濃度の記録
など、長時間のデータの記録に向いています。
数秒間隔であればリアルタイムでグラフを更新させることもできました。
IoTセンサーの仕組み
次のような流れでデータをスプレッドシートに保存します。

- センサーで取得したデータをESP WROOM02に送信
- ESP WROOM02からGAS(Google App Script)を実行
- センサーで取得したデータをGASがスプレッドシートへ書き込む
GAS(Google App Script)は、エクセルでいうところのマクロみたいなもので、様々なデータの操作を自動で行わせることができます。
JavaScriptをベースとしたプログラム言語です。
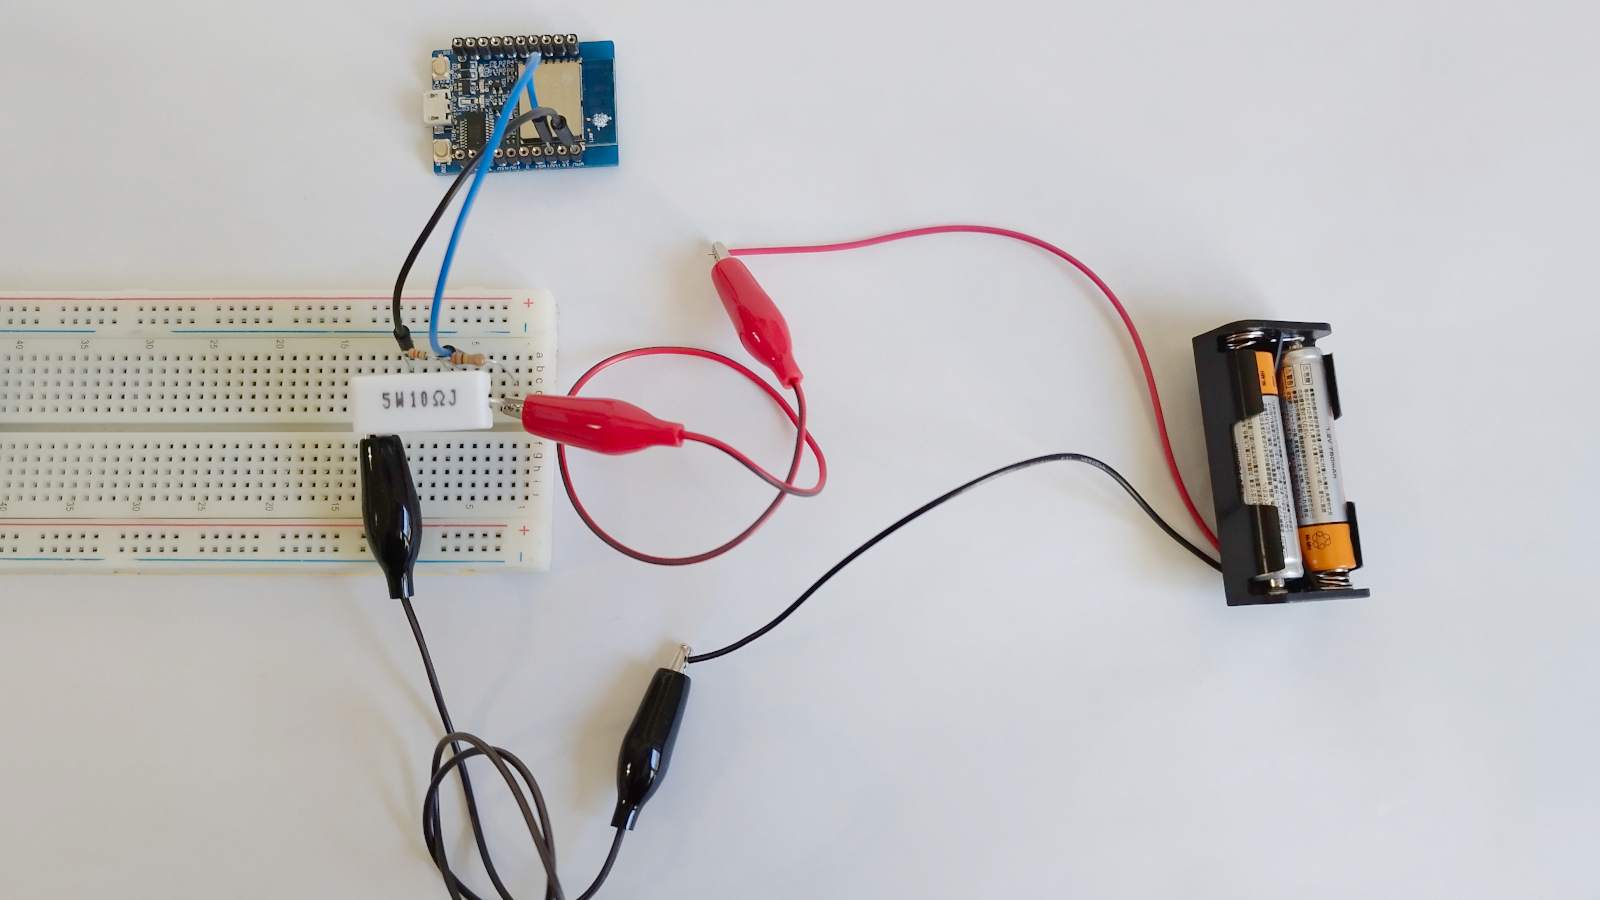
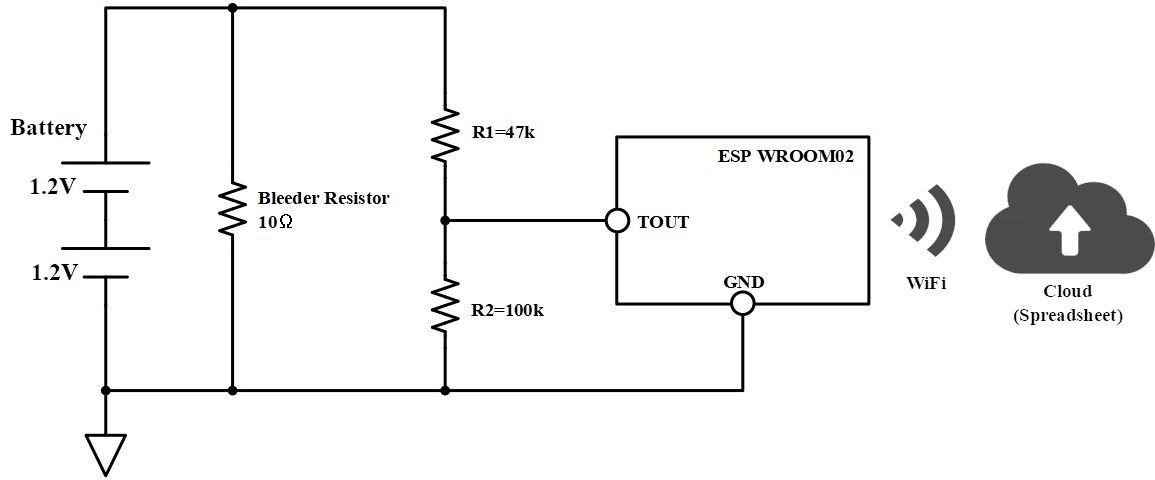
IoTセンサーの構成と回路図
実験では電池の電圧をADCで測定するセンサーを作り、測定値をWROOM02からWiFiでクラウドに飛ばしました。
WROOM02のADC(アナログ入力)の使い方はこちらの記事をご参照ください。
ライブラリ(HTTPSRedirect)を使う
ESPからWiFiでGASに繋ぐところがなかなか上手くいかなかったのですが、最終的にたどり着いたのがHTTPSRedirectというライブラリです。
GitHubHTTPSRedirect
これはESP8266でHTTPS通信をしてGASを動かすためのライブラリです。
ESPとGASのサンプルコードが両方ありますので、これらをベースにプログラムを作っていきます。
というか、不要な部分を削除しただけでできてしました。
それでは、このライブラリを使ってIoTセンサーを作る手順を説明していきます。
GASの使い方と準備
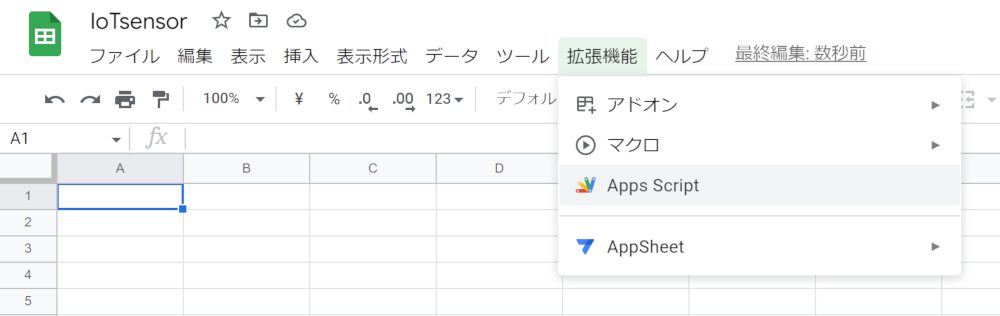
データを書き込むためスプレッドシートを作成します。
作成したら、「拡張機能」→「Apps Script」を選択します。
すると、スクリプトを入力するエディタが開きますので、先程のGitHubに置いてあるGoogleScript.gsを参考にしてスクリプトを組みます。
var SS = SpreadsheetApp.openById('スプレッドシートのID');
var sheet = SS.getSheetByName('シート名');
var str = "";

function doPost(e) {

  var parsedData;
  var result = {};

  try {
    parsedData = JSON.parse(e.postData.contents);
  }
  catch(f){
    return ContentService.createTextOutput("Error in parsing request body: " + f.message);
  }
  if (parsedData !== undefined){
    switch (parsedData.command) {
      case "appendRow":
         var dataArr = parsedData.values.split(",");
         var now = Utilities.formatDate(new Date(), "JST", "yyyy/MM/dd HH:mm:ss");
         dataArr.unshift(now);
         sheet.appendRow(dataArr);

         str = "Success";
         SpreadsheetApp.flush();
         break;
    }
    return ContentService.createTextOutput(str);
  }

  else{
    return ContentService.createTextOutput("Error! Request body empty or in incorrect format.");
  }
}
1行目には作成したスプレッドシートのIDを指定します。
スプレッドシートのURLで確認することができます。

2行目にはシート名を入力します。
20行目で測定日時を取得、22行目でセンサーの値を出力します。
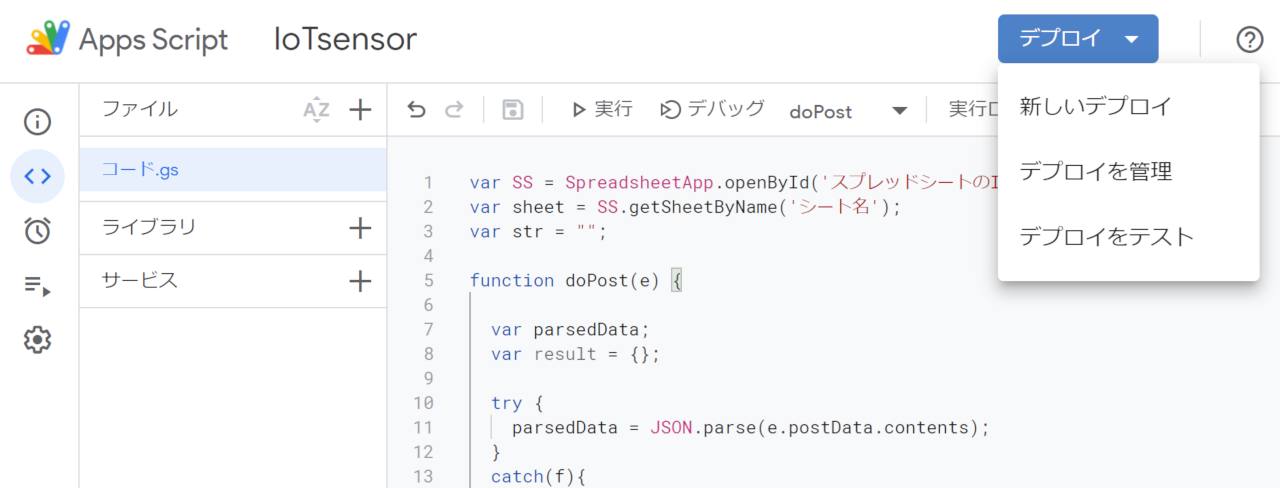
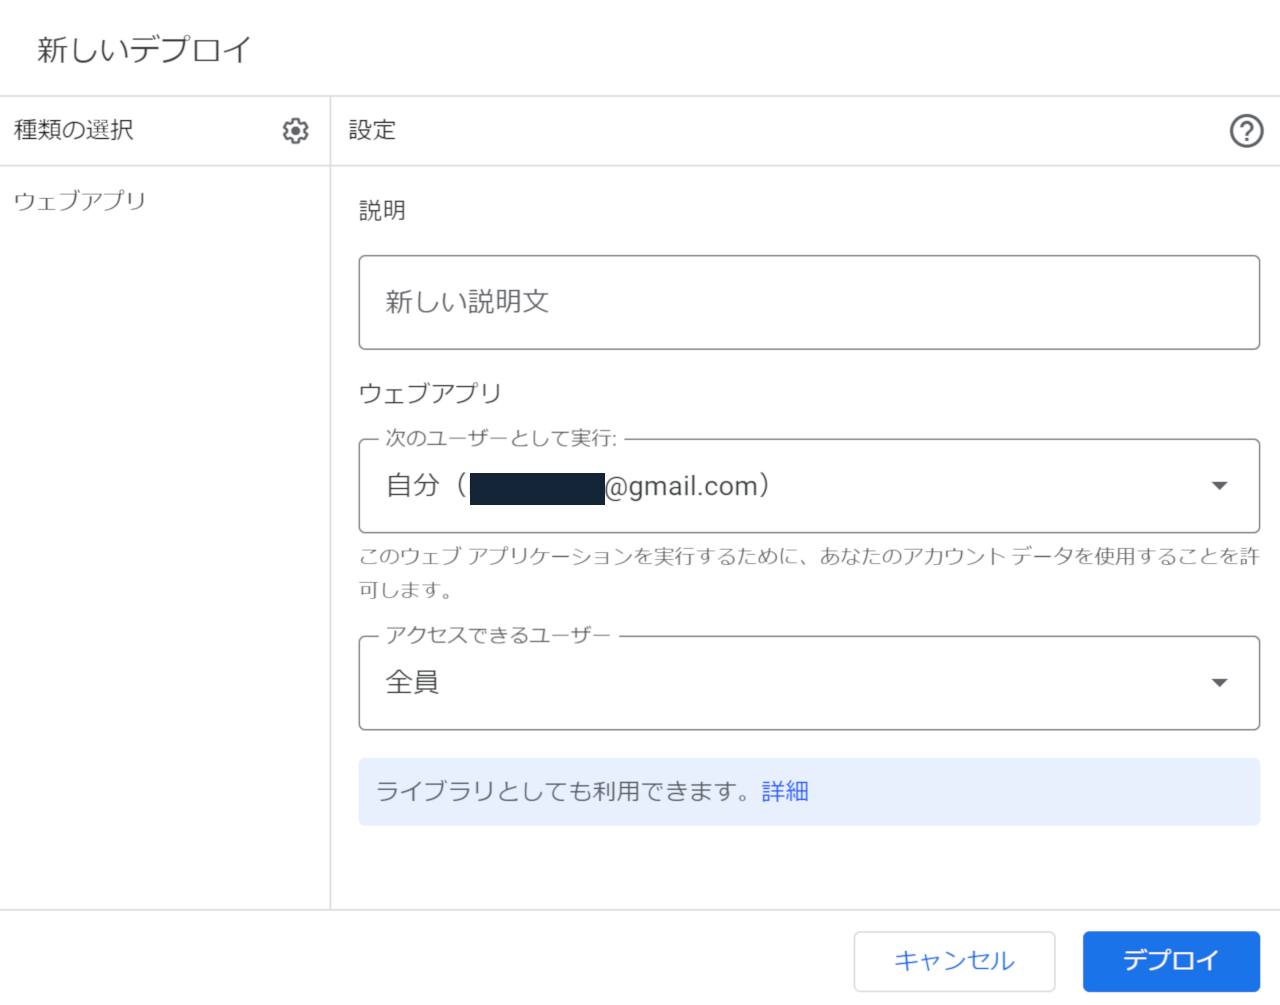
スクリプトを保存したら、右上のデプロイボタンを押し、「新しいデプロイ」を選択。
左の種類の選択から「ウェブアプリ」を選択。
アクセスできるユーザーは「全員」とし、右下のデプロイボタンをクリック。
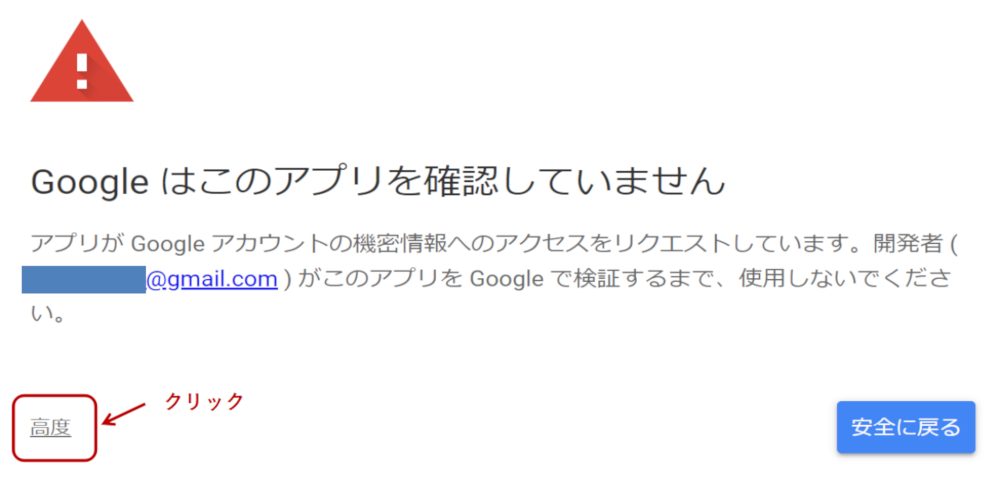
アクセスの承認を求められるのでそのまま進めます。
自分のGoogleアカウントを選択すると下記画面が表示されるので、左下の「高度」をクリックして詳細を表示させて、作成したシートに移動(安全でない)をクリックします。

すると、デプロイIDが表示されるのでコピーしておきます。
このIDはWROOM02のプログラミングで使用します。
ESP WROOM02のArduinoスケッチ
ESPからGASを実行し、データを送信するプログラムをArduinoで作ります。
HTTPSRedirectのGitHubに置かれている、GoogleDocs.inoをベースに作っていきます。
#include <ESP8266WiFi.h>
#include <DebugMacros.h>
#include "HTTPSRedirect.h"

extern const char* ssid = "WiFiのSSID(ネットワーク名)を入力";
extern const char* password = "WiFiのパスワードを入力";
extern const char* host = "script.google.com";
extern const char *GScriptId = "デプロイIDを入力";

const int httpsPort = 443;

String url = String("/macros/s/") + GScriptId + "/exec";

String payload_prefix =  "{\"command\": \"appendRow\", \
                    \"sheet_name\": \"シート名を入力\", \
                    \"values\": ";

String payload = "";

HTTPSRedirect* client = nullptr;

void setup() {
  Serial.begin(115200);
  Serial.flush();

  Serial.println();
  Serial.print("Connecting to wifi: ");
  Serial.println(ssid);
  Serial.flush();

  WiFi.begin(ssid, password);
  while (WiFi.status() != WL_CONNECTED) {
    delay(500);
    Serial.print(".");
  }
  Serial.println("");
  Serial.println("WiFi connected");
  Serial.println("IP address: ");
  Serial.println(WiFi.localIP());
}

void loop() {
  static int error_count = 0;
  bool flag = false;

  client = new HTTPSRedirect(httpsPort);
  client->setInsecure();
  client->setPrintResponseBody(true);
  client->setContentTypeHeader("application/json");

  Serial.print("Connecting to ");
  Serial.println(host);

  // Try to connect for a maximum of 5 times
  for (int i = 0; i < 5; i++) {
    int retval = client->connect(host, httpsPort);
    if (retval == 1) {
      flag = true;
      break;
    }
    else
      Serial.println("Connection failed. Retrying...");
  }

  if (!flag) {
    delete client;
    Serial.print("Could not connect to server: ");
    Serial.println(host);
    Serial.println("Exiting...");
    ESP.deepSleep( 0 );
    delay( 1000 );
  }

  float vRatio = 0.32;
  int adcValue = analogRead(A0);
  int calValue = 0.946 * (adcValue - 13) / vRatio;

  payload = payload_prefix + "\"" +  calValue +  "\"}";

  if (client->POST(url, host, payload)) {
    Serial.println("data sent successfully");
  }
  else {
    error_count++;
    Serial.print("Error");
    Serial.println(error_count);
  }

  if (error_count > 3) {
    Serial.println("Halting processor...");
    delete client;
    client = nullptr;
    Serial.flush();
    ESP.deepSleep(0);
  }

  delete client;

  delay(60000);
}
5,6行目:接続するWiFiのネットワーク名とパスワードを入力します。
8行目:GASの設定時に出てきたデプロイIDを入力します。
14~16行目:送信先のシート名と値を決めるための型。
送信する値(AD変換値)とは78行目で結合しています。
74~76行目:vRatioは抵抗分圧比。
TOUT端子で測定したAD変換値(adcValue)を電圧に変換しています(calValue)
78行目:payload_prefixにcalValueを結合してGASへPOSTします。
測定結果
スプレッドシートの1行目に「時間」、「電池電圧」を記入しておきます。
ESP WROOM02を起動させると、このように電池の放電特性が取得できました!
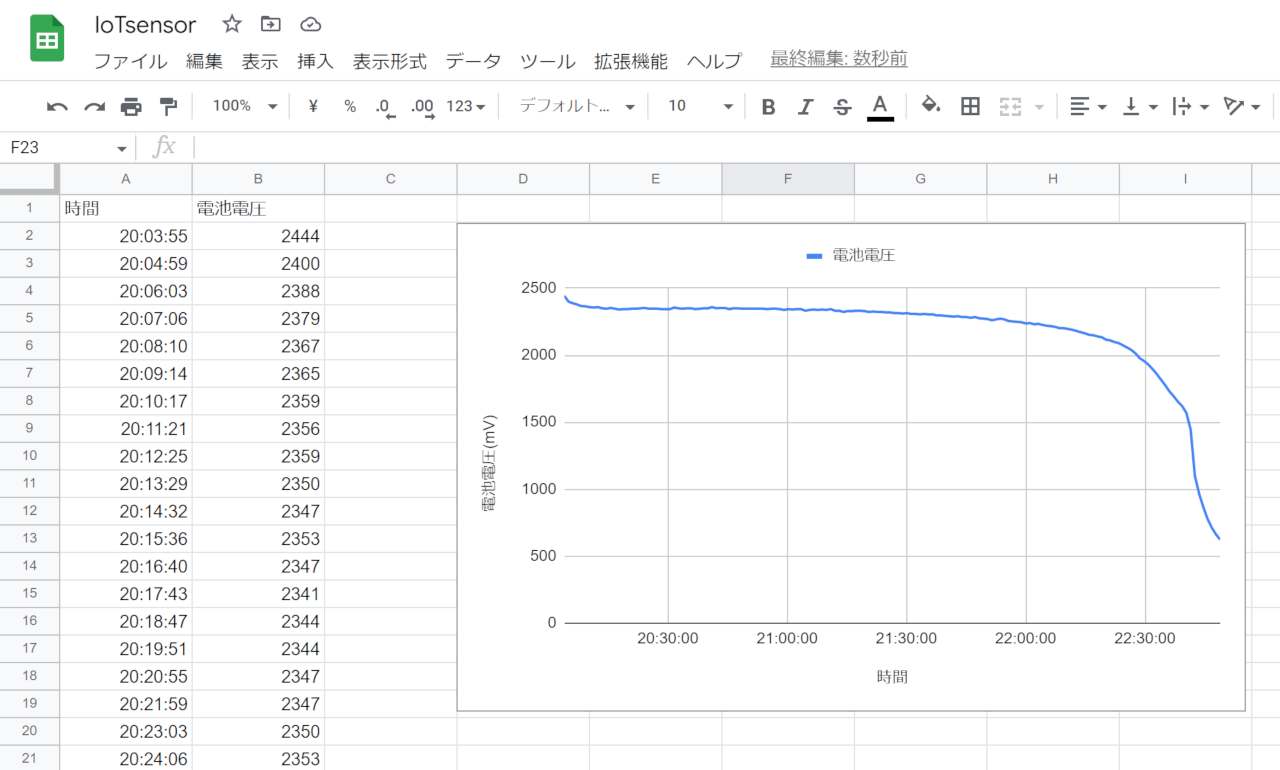
このプログラムでは1分ごとにデータを測定していますが、最速で回すと4~5秒間隔でデータが更新されていきます。
ESP WROOM02のADCで取得した値をWiFiでGoogleスプレッドシートに送信してみた。 pic.twitter.com/VXkDiFOv9A
— りょうのすけ (@ryo_analog) October 22, 2022